Un dels llasts evidents dels fets esdevinguts a la tardor del 2017 a Catalunya ha estat el protagonisme que ha adquirit des d’aleshores el poder judicial i com s’ha descompensat absolutament el lògic i necessari equilibri entre els poders d’un Estat. La inacció de Mariano Rajoy com a president del govern a l’hora de vehicular a la política totes les demandes de l’independentisme català i el seu fracàs internacional a l’hora de topar amb les urnes en la votació de l’1 d’octubre va portar a un pas endavant del deep state que es va concretar el dia 3 d’octubre en el discurs de Felip VI i un realineament dels poders de l’Estat. Ningú no dubta a hores d’ara que el poder judicial ha aconseguit la preeminència del poder amb majúscules davant el legislatiu i l’executiu. Ho pateix l’independentisme en el dia a dia amb sentències absolutament forassenyades i una repressió sense un final en l’horitzó ja que l’Estat —bé sigui a través del Suprem, l’Audiència Nacional, el TSJC, el jutjat 13 o el Tribunal de Comptes— no cessa d’escorcollar causes noves amb què poder iniciar nous procediments amb nous investigats. [….]
Arxiu de l'autor: admin
Les llengües a l’estat francès: entre el renaixement i la desaparició
L’Assemblea francesa ha aprovat avui la primera llei de protecció i promoció de les anomenades llengües regionals, la qual esdevé una base legal per a la immersió lingüística, reconeix la retolació bilingüe i permet de posar als noms i cognoms les grafies que no existeixen en francès, com la ‘ñ’ del bretó i els accents propis del català.
Malgrat ser l’única llengua oficial, d’ús generalitzat, la llengua francesa no ha tingut sempre aquesta preponderància al territori. Ha estat arran d’una política estatal premeditada que s’ha homogeneïtzat a tots els indrets i aspectes de la vida social.
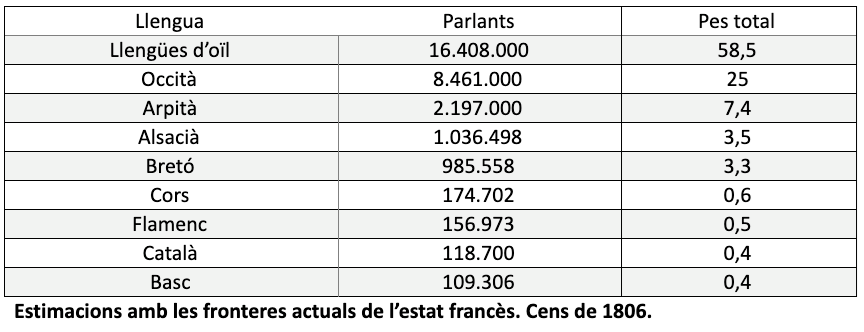
Abans de la formació de l’estat modern, la situació era molt diferent. Fa només dos segles, el 1806, en ocasió del cens de població, es va fer una enquesta lingüística a tots els municipis de l’Imperi francès sobre la llengua materna dels habitants.
Més del 40% de la població parlava una de les llengües avui minoritzades, i prop d’un terç de l’actual territori francès era de domini lingüístic occità. La divisió natural era: al sud de l’estat, es parlava la llengua d’oc (en totes les seves varietats) i a la meitat nord, les llengües d’oïl, a la qual pertany el francès, però també el picard, el normand i el gal·ló.
Canvia la veu de lectura de Calibre
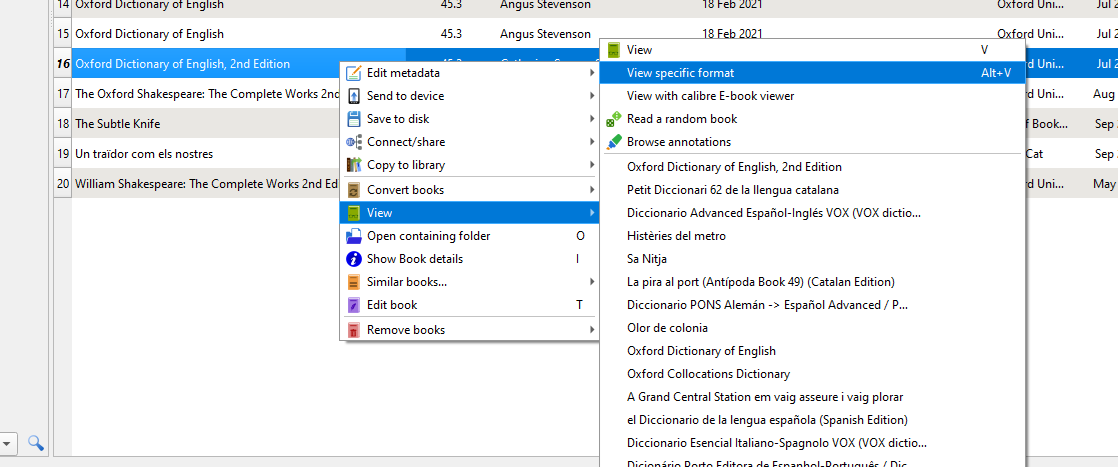
Des de la biblioteca ‘Calibre’ triem el llibre que volem llegir premen View.

S’obre el llibre per la pàgina 1. Premen ESC surten aquestes icones. Amb Read Aloud es posa a llegir en l’ultima veu selecciona

A peu de pàgina a la esquerra podem veure:

Amb la roda dentada podem triar les veus.
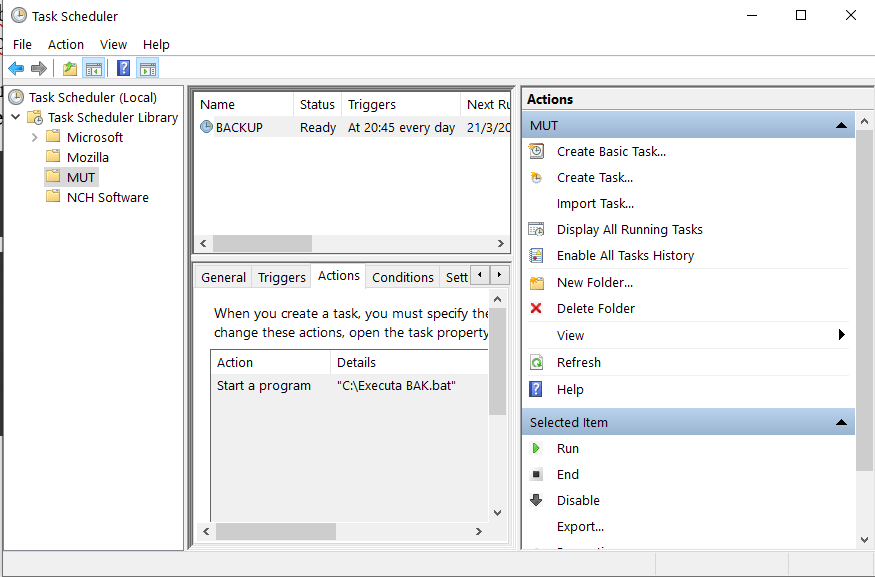
revisar task sheduler: bd backup
general: MySqlBackup window10
triggers: daily at 19:30 status;enable
actions: star a program “c:\dropbox\dbForge studio\executa BAK.bat”
Per comprobar que l’acció funciona es pot llançat l’acció des del indicador d’ordres de Windows. si dona l’error “no està permès l’accés a root@192.168.1.1, verificar a comptes d’usuari del phpMyAdmin que aquest usuari existeix. .

Observem que hi ha creada la tasca BACKUP que corre ‘every day’ a les 20:45. L’acció es executar “C:\Executa BAK.bat”
Executa BAK.BAT
“c:\Program Files\Devart\dbForge Studio for MySQL\dbforgemysql.com” /backup /projectfile:”T:\dbForge Studio\fons_mut.backup”
“c:\Program Files\Devart\dbForge Studio for MySQL\dbforgemysql.com” /backup /projectfile:”T:\dbForge Studio\polidic_eng.backup”
“c:\Program Files\Devart\dbForge Studio for MySQL\dbforgemysql.com” /backup /projectfile:”T:\dbForge Studio\polidic_cat.backup”
“c:\Program Files\Devart\dbForge Studio for MySQL\dbforgemysql.com” /backup /projectfile:”T:\dbForge Studio\polidic_fra.backup”
“c:\Program Files\Devart\dbForge Studio for MySQL\dbforgemysql.com” /backup /projectfile:”T:\dbForge Studio\polidic_ger.backup”
“c:\Program Files\Devart\dbForge Studio for MySQL\dbforgemysql.com” /backup /projectfile:”T:\dbForge Studio\polidic_ita.backup”
“c:\Program Files\Devart\dbForge Studio for MySQL\dbforgemysql.com” /backup /projectfile:”T:\dbForge Studio\polidic_por.backup”
“c:\Program Files\Devart\dbForge Studio for MySQL\dbforgemysql.com” /backup /projectfile:”T:\dbForge Studio\polidic_eus.backup”
“c:\Program Files\Devart\dbForge Studio for MySQL\dbforgemysql.com” /backup /projectfile:”T:\dbForge Studio\agenda.backup”
fons_mut.backup … etc, són programes que s’han generat prèviament en dbForge Studio for MySQL quan s’han fet els backup i s’han guardat en aquest directori.
Obri un llibre en un lector personalitzat
Treure llibres duplicats de la llibreria Calibre
Calibre pot gestionar milers de llibres, no conec el límit però és el mateix que la base de dates SQLite. Podem estar parlant de milers o centenars de milers de llibres. La velocitat de la gestió de la biblioteca depèn bàsicament de l’ordinador que utilitzem. Així que un eina per eliminar llibres repetits es fa quasi imprescindible. Afortunadament existeix el plugin que indico a continuació i que l’he provat amb èxit.
Cleaning up an ebook library with Calibre
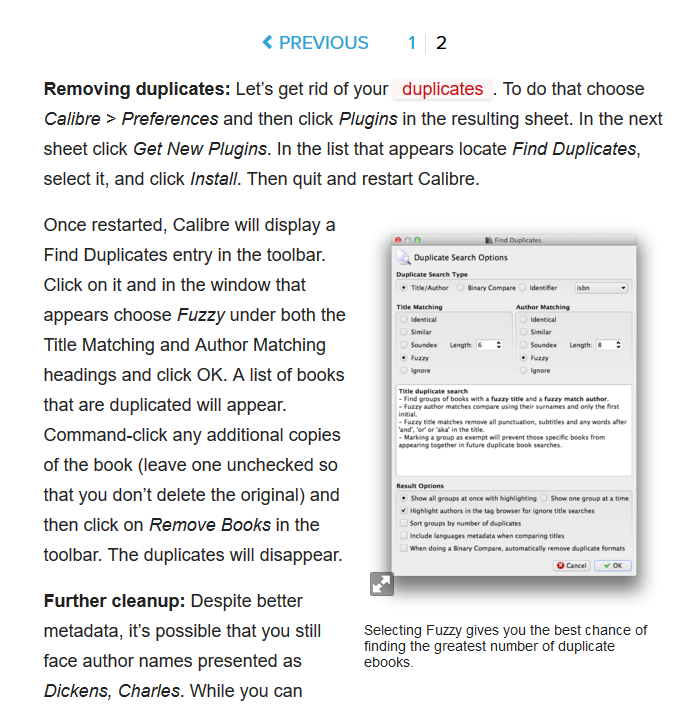
Un cop instal·lat el plugin si volem treure els duplicats de la llibreria que tenim oberta en aquests moments. Hem de fer córrer Find book duplicates. La aplicació ens presentarà tots els llibre duplicats. Per tan només hem d’esborrar la mitat.

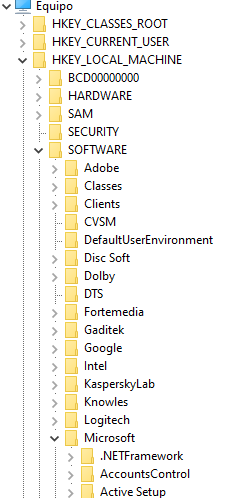
Editor de registre de Windows. Idiomes
How can I sign in to DSM/SRM with root privilege via SSH?
How can I sign in to DSM/SRM with root privilege via SSH?
Purpose
This article guides you through how to sign in to DSM (DiskStation Manager) and SRM (Synology Router Manager) as root via SSH.
Warning:
- Enabling SSH service may bring security risks to your system. Please enable it only when necessary and avoid making changes to system configurations.
Contents
Resolution
Enable SSH service
-
Go to the terminal setting page on your Synology device:
- Synology NAS: DSM Control Panel > Terminal & SNMP > Terminal
- Synology Router: SRM Control Panel > Services > System Services > Terminal
- Synology NAS: DSM Control Panel > Terminal & SNMP > Terminal
- Tick Enable SSH service.
- Specify a port number for SSH connections and save the settings. To ensure system security, we suggest replacing the default port 22 with another one.1
Sign in from Windows 10, macOS, or Linux
For DSM 6.0 or later
-
Launch the terminal application on your computer:
-
Windows 10: Windows PowerShell

- macOS: Terminal.app
- Linux: Terminal
-
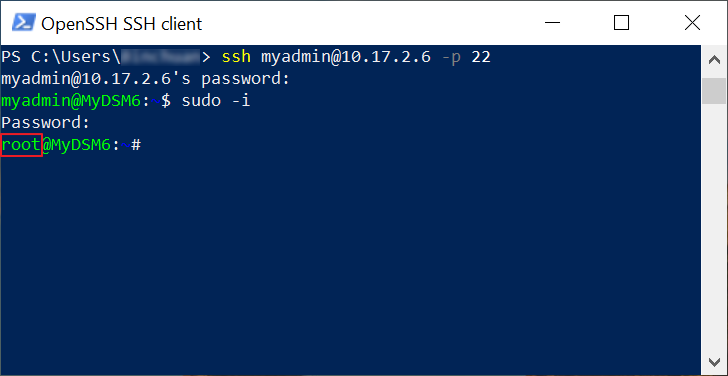
- Type the following command and press Enter:
|
Command |
Example |
|
ssh DSM admin account@DSM IP address -p SSH port number |
ssh myadmin@10.17.2.6 -p 22 |
- Enter the password of your DSM’s administrator account.2
- Type sudo -i and press Enter.
- Enter the password of your DSM’s administrator account again, and press Enter.
- You are now signed in to your DSM with root privilege via SSH.
For DSM 5.2 or earlier/SRM
-
Launch the terminal application on your computer:
- Windows 10: Windows PowerShell
- macOS: Terminal.app
- Linux: Terminal
- Windows 10: Windows PowerShell
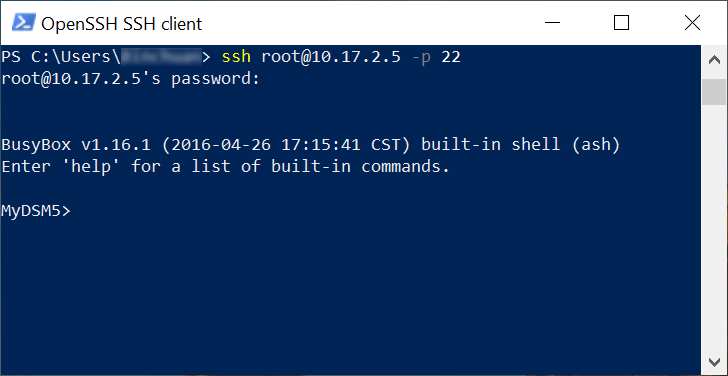
- Type the following command and press Enter:
|
Command |
Example |
|
ssh root@DSM/SRM IP address -p SSH port number |
ssh root@10.17.2.5 -p 22 |
- Enter the password of the default account “admin”.
- You are now signed in to DSM/SRM with root privilege via SSH.
Sign in from earlier versions of Windows
Earlier versions of Windows (e.g., Windows 7) require a third-party software to establish SSH connections to Synology devices. We take the software PuTTY as an example in the following steps.
For DSM 6.0 or later
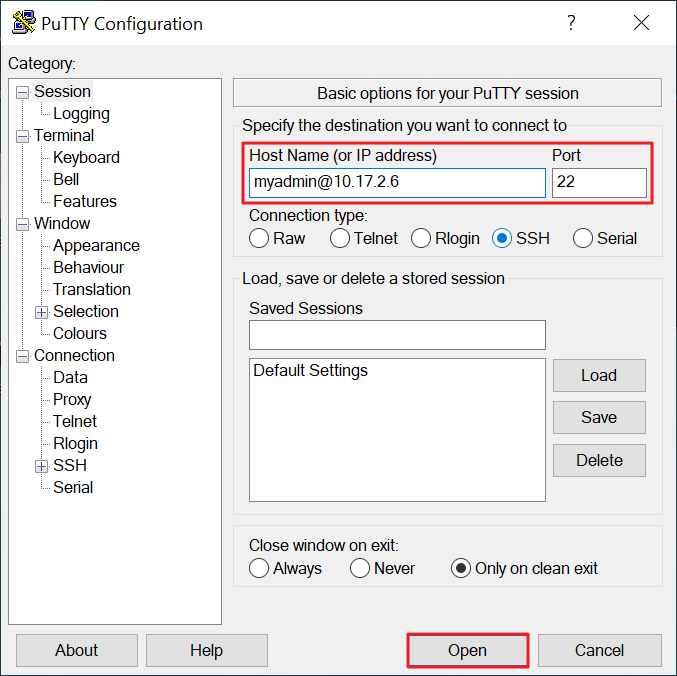
- Launch PuTTY on your computer.
- Enter “DSM admin account@DSM IP address” in the Host Name (or IP address) field, e.g., “myadmin@10.17.2.6”.
- Enter the SSH port of your DSM in the Port field, e.g., 22.
- Click Open.
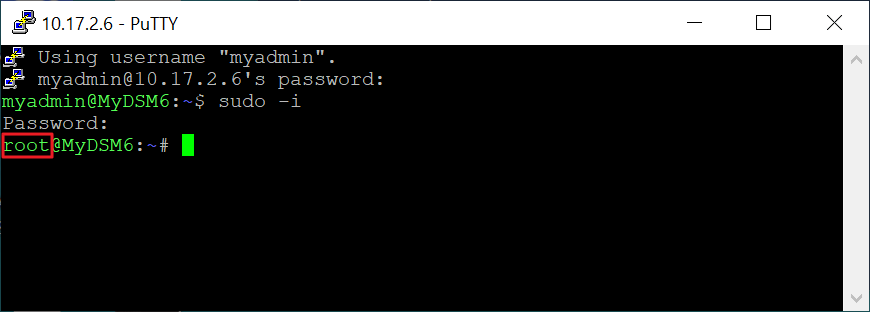
- Enter the password of your DSM’s administrator account.2
- Type sudo -i and press Enter.
- Enter the password of your DSM’s administrator account again, and press Enter.
- You are now signed in to your DSM with root privilege via SSH.
For DSM 5.2 or earlier/SRM
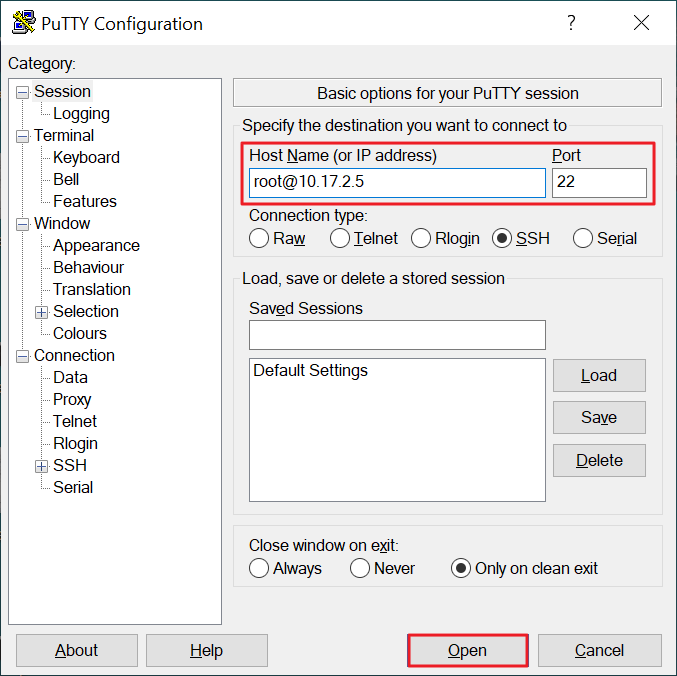
- Launch PuTTY on your computer.
- Enter “root@DSM/SRM IP address” in the Host Name (or IP address) field, e.g., “root@10.17.2.5”.
- Enter the SSH port of your Synology device in the Port field, e.g., 22.
- Click Open.
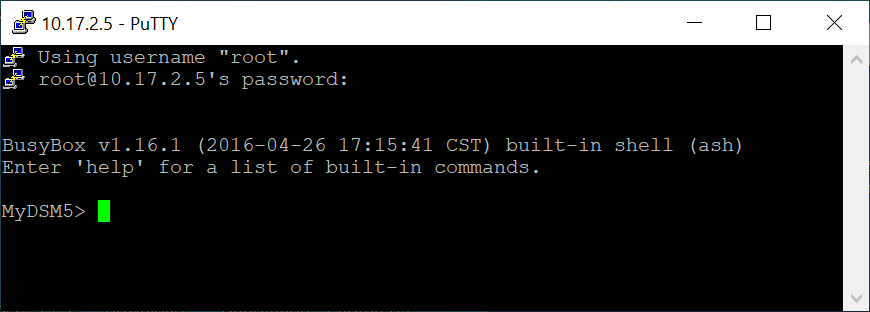
- Enter the password of the default account “admin”.
- You are now signed in to your Synology device with root privilege via SSH.
Notes:
- To enhance the security of SSH connections, you can also avoid the ports listed in this article.
-
The following accounts are available for SSH logins with root privilege:
- DSM 6.0 and later: Users in the administrators group
- DSM 5.2 and earlier/SRM: root
- DSM 6.0 and later: Users in the administrators group
Synology DS220+ (http://192.168.1.76:5000/ web_index.html)
- Instalació
El disc “backup volum 1” està introduït a la bahia 1 (ve del DS918+ que automàticament ha fet una migració). EL SISTEMA ARRANCA amb aquestes carpetes:
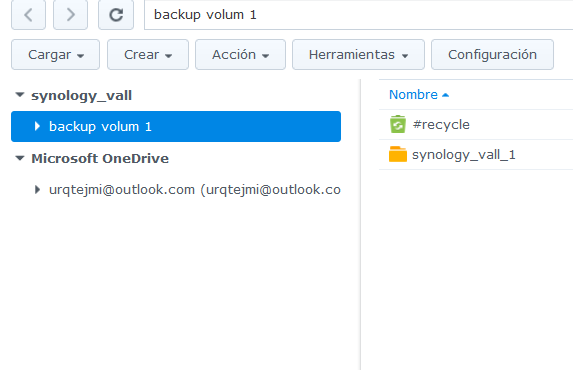
Aquestes són les aplicacions que ha carregat per defecte:
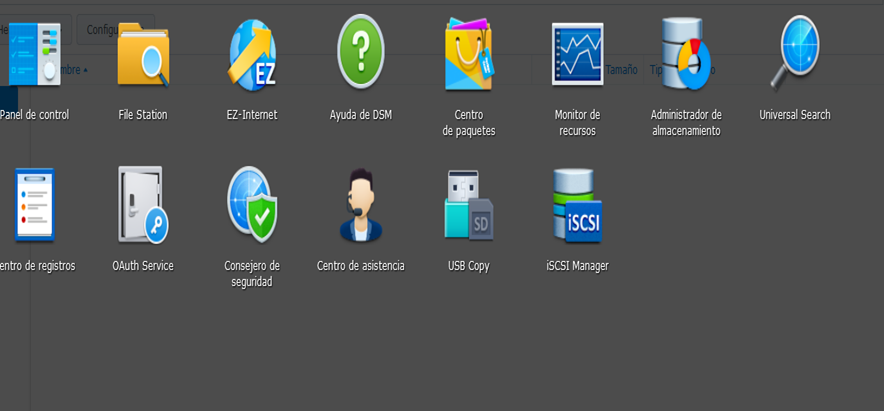
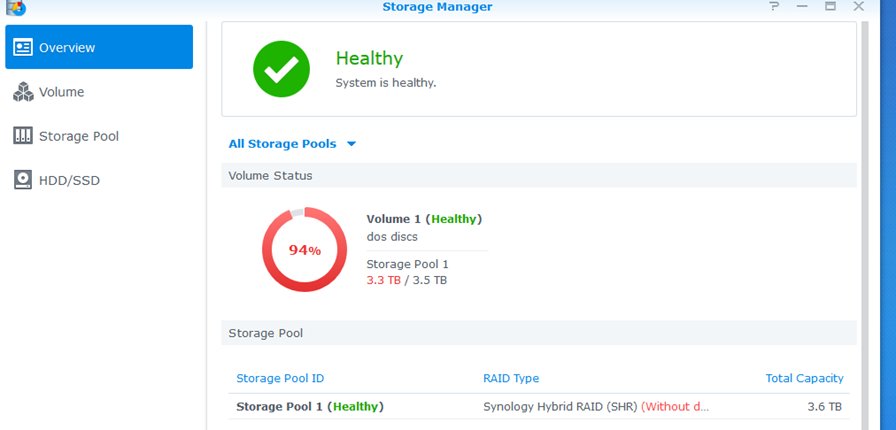
Poso un disc nou a la bahia2 i aquesta és la informació del administrador de emmagatzematge. Es pot observar que s’identifica amb ‘unused driver’. Amb aquest disc es pot crear un volum 2 o sumar-lo al volum 1 que passaria a 3,5+3,5 TB.

2. Tipus de Reset
Mode 1: Reset administrator login credentials and network settings4
- Locate the RESET button on your Synology NAS.5
- Use a paper clip to gently press and hold down the RESET button for about 4 seconds until you hear a beep, and then release the button immediately.
- Launch Web Assistant. Double-click on your Synology NAS. On the login page, enter the system default username admin, leave the password field blank, and click Sign In.
- Create a strong password and click Submit.
- Sign in to DSM with the username admin and the password that you have just created.6
- Go to Control Panel > User > the User tab and double-click on the administrator account you want to use.
- In the pop-up window, go to the Info tab and reset your password. Click OK.
- Disable the admin account by first signing in with your administrator account, and then going to Control Panel > User > the User tab. Double click on admin and tick the Disable this account checkbox. Click OK.
- The admin account status should now be Disabled.
Mode 2: Reset Synology NAS and re-install the operating system DSM
This mode wipes out all system configurations and carries out all the reset functions included in Mode 1.
- Find the RESET button at the back of your Synology NAS (please click here to consult the Hardware Installation Guide for your Synology NAS model if you have difficulty locating the RESET button).
- Use a paper clip to gently press and hold down the RESET button for about 4 seconds until you hear a beep, and then release the button immediately.
- Press and hold down the RESET button again for 4 seconds until you hear 3 more beeps.
- Wait for about 2 minutes until the STATUS light on your Synology NAS blinks orange, indicating that your Synology NAS has been successfully reset and the system configurations have been wiped.
- To re-install DSM, enter find.synology.com in the search bar of your web browser and find your Synology NAS on the Web Assistant page. The server name of your Synology NAS should be either DiskStation, FlashStation, or RackStation, depending on your Synology NAS model. The status of your device should be Configuration lost.
- Double-click on your Synology NAS and follow the wizard to complete the re-installation process.
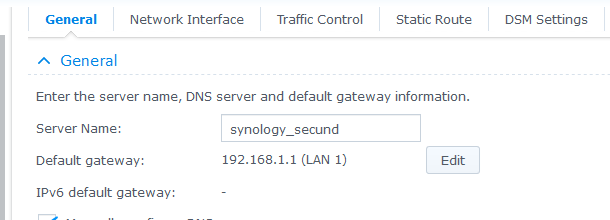
3. Canviar nom i pasword del servidor amb Synology Assistand
S’entra a control panel/netword/general es posa el nou nom i es llança Synology assistan.
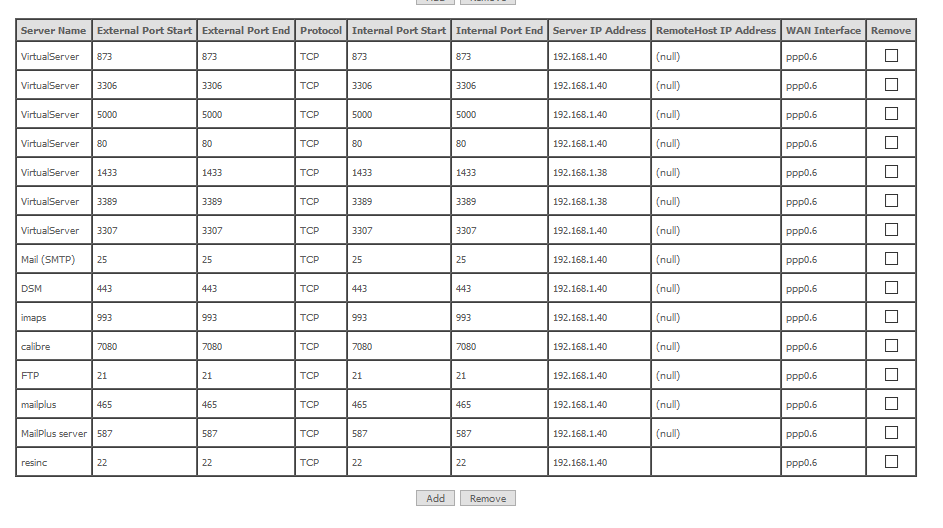
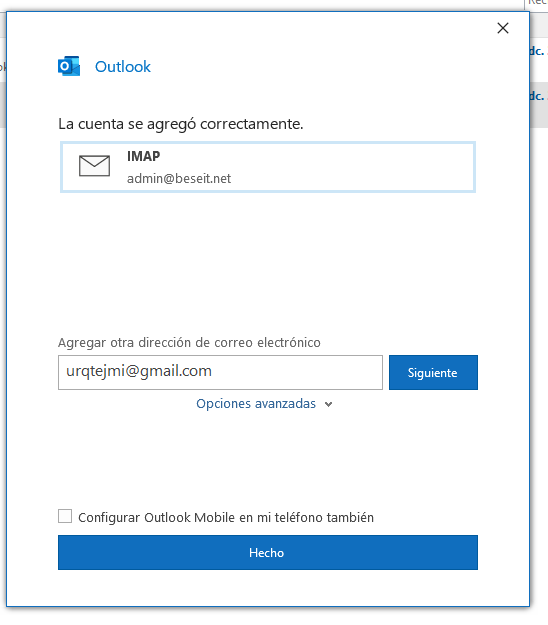
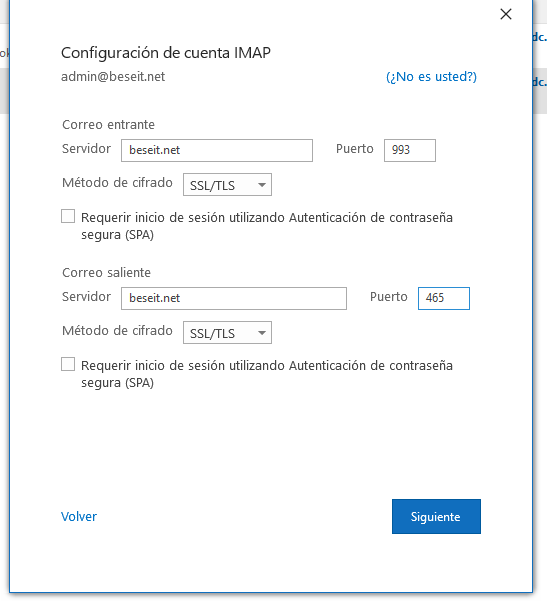
Configurar compte IMAP de outlook
Configurar
password: Beseit…..!
